


As the Romex wires are commonly used in electrical installations, it becomes pertinent for professionals in the construction industry to ensure that they are well-versed with the correct techniques and approaches for stripping the Romex wiring. Remember that the insulation and conduction must be intact when assembling or disassembling the wiring. The knowledge this guide seeks to impart is fundamental in enhancing times strip wires in Rome. This comprehensive resource will assist professionals in developing their skills, minimizing risks, and producing the best possible outcomes for their electrical projects, as it includes technical specifics followed by step instructions. From the perspective of an electrician or someone attempting the trade for the first time, this guide should be able to improve comprehension of working with the Romex wire.
What exactly is Romex, and what is its purpose in wiring?
Explaining the various components present in Romex wire
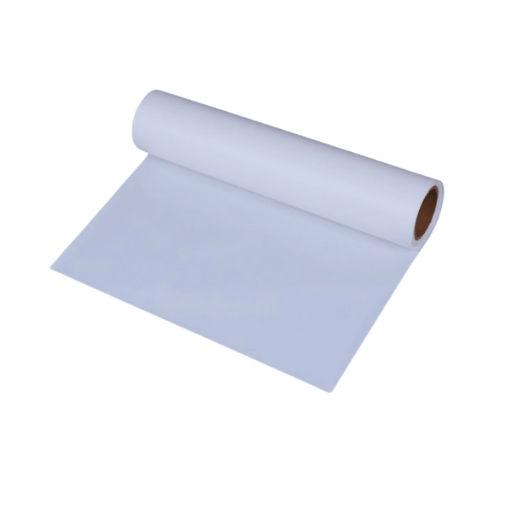
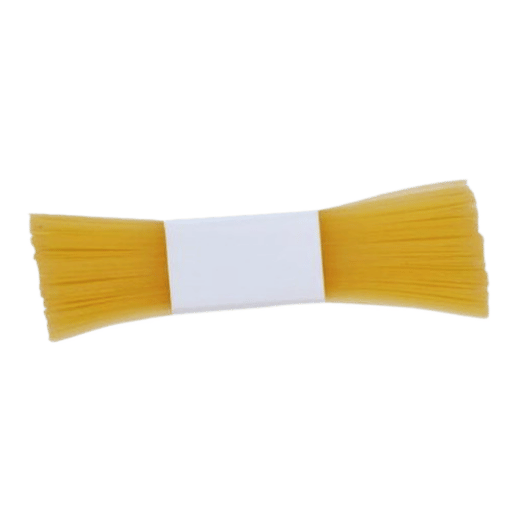
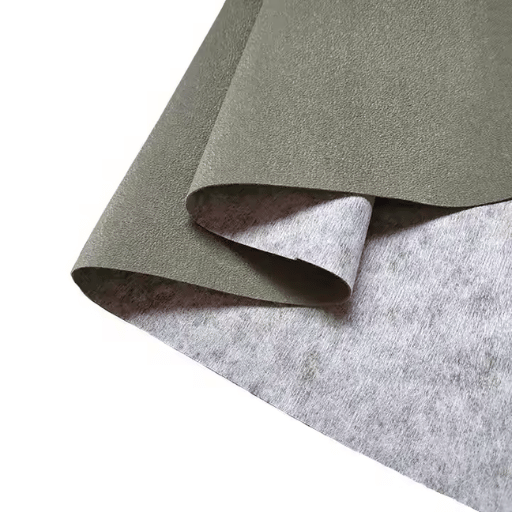
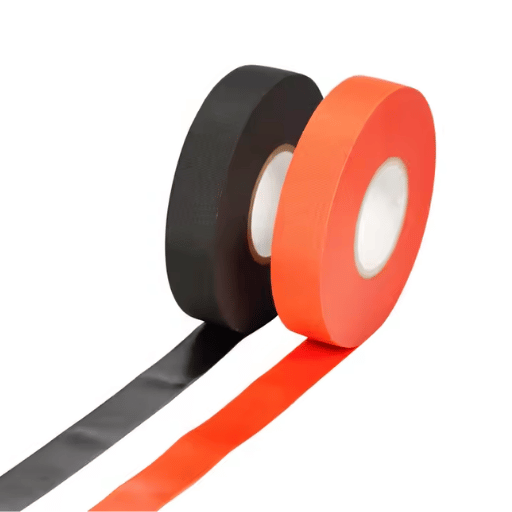
Romex wire, also called NM cable or non-metallic, is one of the most common forms of wiring found in residential homes and light commercial buildings. It typically comprises three parts: the outer plastic sheath, which acts as thermal insulation and a protective covering; the inner conductor wires – which are most likely to be copper and may include hot, neutral, and ground wires; and lastly, paper or fabric filling which supports the internal structure. Stripping Romex wire is necessary during an electric installation, as it enables contractors to access conductor wires requiring an appropriate termination. Ensured conditions help strip the soldered ends so that wires are not damaged, and the insulation is preserved to avoid possible electrical disturbances during the proper conductivity of the wires.
The important role of stripping Romex wire correctly in electrical work
In an electrical task, stripping wires is, without a doubt, the most important step, as it forms the basic foundation for the safety and efficiency of the electrical subsystems. According to reports and studies, it is one of the best practices/techniques to avoid damage to the wires that make up the circuit and, therefore, cut down short circuits or even electrical fires. Besides, accurate stripping ensures that cut wires remain insulated; hence, no electric shock over this or energy is wasted. Also, clenched wires are not the cause of electrical failures; hence, properly cutting wires ensures that twisted wires are put in place. Hence, this technique is necessary for professionals as it allows all electrical work to be done safely and well.
Safety Guidelines for Romex Use
For the effective use of Romex wire, some of the most important safety measures are as follows: To begin, before engaging in any electrical work, it is advised first to switch off the circuit in question to avoid electrocution. Ensure that insulated tools are used and wear rubber-soled shoes to avoid touching bare wires. Ensure all external protective covering and insulation are in place to avoid exposing live conductor wires. Follow local codes and electrical guidelines to ensure the safety standards of the building and its electrical works. Finally, a second round of examination of the connections made will be conducted to ensure that no loose wires may result in sparking, malfunctioning, or accident.
Which tools do I require to prepare the Romex wire?
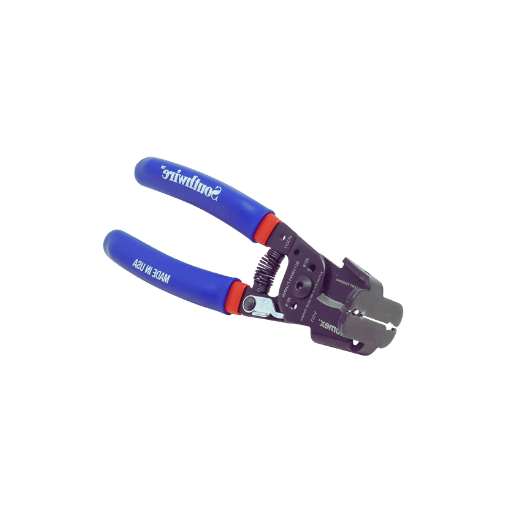
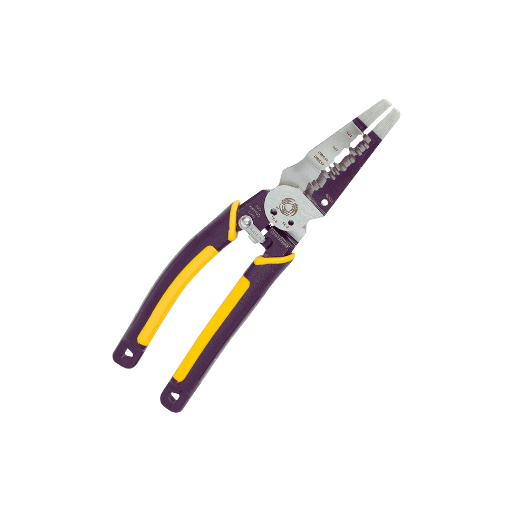
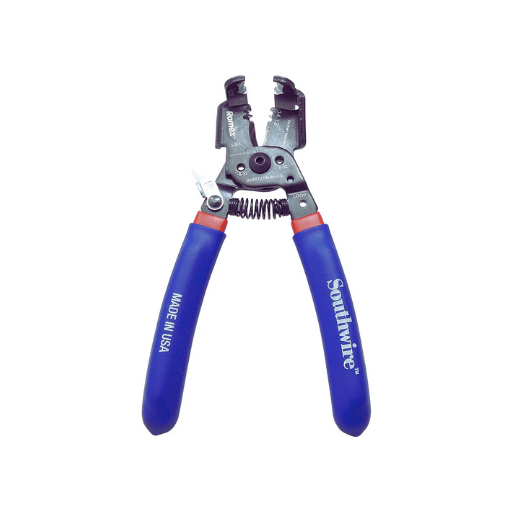
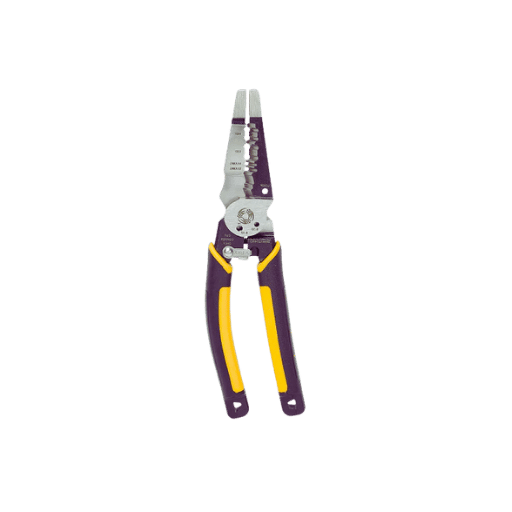
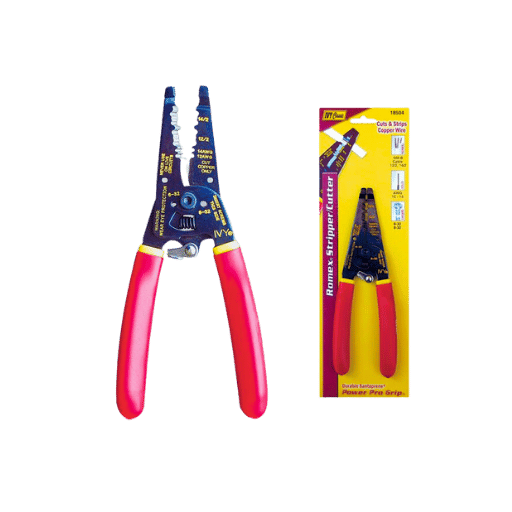
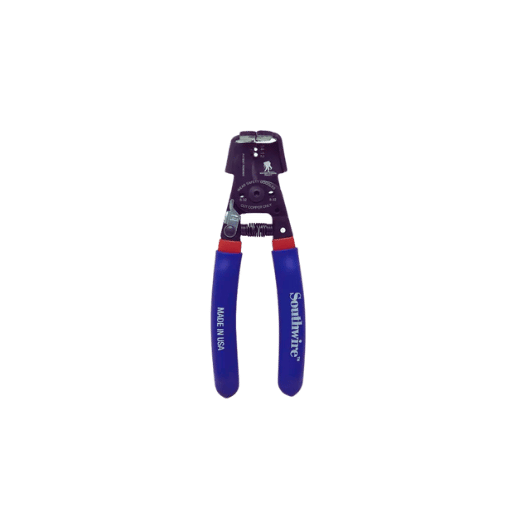
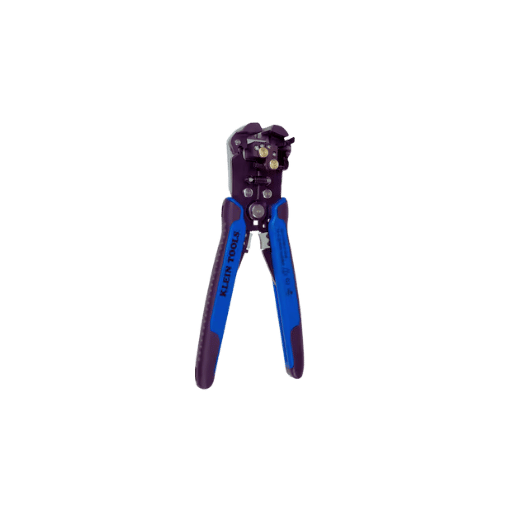
Essential tools for stripping Romex: Wire strippers, razor knives, and cable rippers
As I have stated before, wire stripping is an important function that requires various tools. Wire cutters are the focus of this tool’s attention, I mean it is self explanatory the tool’s name, its purpose is to take off the insulating materials simultaneously preserving the integrity of the inter-conductors by performing an accurate cut. Razor knives, on the other hand, come in handy when an outer sheath needs to be removed without causing too much disruption on the internal wires, as minimal wire damage is preferred. Cable rippers are manufactured for Romex, this tool assist in severing the outer Romex insulation facilitating the pulling of wires inside. These practices, if done properly, ensure that a raw Romex wire is prepped for installation or any other maintenance task safely and efficiently, especially when it comes to wire stripping procedures.
A comparison between manual and automatic wire strippers for Romex
Several differences between manual and automatic wire strippers for Romex relate to efficiency, accuracy, and the ability of the user to control the stripping action. Automatic wire strippers are considered to perform better-stripping as long as the wire size is standardized for the job, but their pre-set pressure settings prevent them from stripping on non-standard gauge wires. In practice, manual wire strippers require more effort and skill to achieve consistent results, which suits those more hands-on individuals. On the other hand, automatic Romex wire strippers strip wires at a consistent speed, which makes the wire stripping process faster and more acceptable for bulk requirements. Each tool has its own set of benefits, and the choice is largely based on the job’s requirements and the person doing it.
Picking the Right Tool according to the Wire Type and Wire Gauge
The wire gauge and type determine the tool required for Romex wire stripping. Manual wire strippers can strip thinner wires and provide adjustments required to avoid damaging the wire, allowing greater accuracy in using the stripper on a specific wire gauge. They provide compatibility for several wire types and are useful when the project employs different types of wires. In the case of basic Romex wires, especially in large-scale jobs, automatic wire strippers are quick and consistent and can strip wires easily without damaging them. However, tools must be suitable for the type and number of gauges being stripped to ensure effectiveness and avoid damage to the wires.
How do I remove insulation from Romex electric wire using a wire stripper?
In this how-to video, I detail how to use a wire stripper on Romex.
- Tools Required: Make sure you have the right type of wire stripper according to the gauge size you will use. It should also be free of rust and working well.
- Romex Wire Preparation: Set up the room and place the length of the Romex wire that requires stripping unwound and unwound.
- Find the right slot for stripping: It’s important to find the gauging slot of wire stamped on the dedicated wire stripping equipment. Manual strippers are available, so one can set the gauge manually to avoid inaccuracy.
- Cut into the outer sheath: Use the wire stripping tool and place it over the Romex wire sheathing. Sheathing on the outer surface should be scratched using enough pressure to cut the sheath but no cut-ins should be done on the inner wires.
- Take the sheathing out: With the wire stripper, move across the length of the wire until all the outer sheath is removed from the insulated wires.
- Remove insulation from the inner wires: Move to the next step by selecting the corresponding gauge of the insulating blanks that cover the wires and place it inside the chosen slot. Wrap wires into the next wire in the slot, using the handles, push down to cut the insulation, and yank the wire back to remove the insulation.
- Review the Winding: Check that the internal conductors in the wire are intact and that the appropriate length of insulation is removed.
This systematic process ensures that you can strip the Romex wire efficiently, without any damage, and in a way that is safe for effective wire installation.
Best Practices for Removing Sheath from Different Sizes of Romex Wire
- Appreciate the Wire Size: Different wire gauges have different specifications and employ different techniques. To get a clean cut, use a calibrated wire stripper appropriate for your working gauge.
- Adjust Pressure Accordingly: Thin wires, especially if coated, should receive less pressure. Thicker wires can absorb more pressure, but accuracy is required to avoid nicking.
- Select the Right Slot: Always use the required slot for stripping that is compatible with the wire gauge; otherwise, the conductors will be compromised.
- Regularly Check Tools: Regular use of the wire stripper should push the soft blades to retract into the housing. Dumb blades create problems as striping may become uneven, damaging the conductor and cable.
- Practice Consistency: Apply the same amount of pressure across all operations and the same technique to ensure all parts stripped are identical and that the best practices are followed.
Wire Stripper Mistakes and Things to Avoid
- Using the Incorrect Tool for the Wire Gauge: To ensure the wire is cut properly and the conductors are not damaged, wire strippers should only be used on wires for which they are appropriate. Such indicators as wire gauges should be considered.
- Applying Nearly Too Much Force: Applying excessive force to wires causes nicks and dents, which can lead to problems later on and contribute to wire failure. Make sure to check the pressure being exerted for wires on thicker gauges.
- Selecting the Wrong Slot: Using the wrong stripping slot is a basic blunder that can damage the overall integrity of the wire. Make sure to check if the slot matches the actual wire.
- Stripping too fast: Stripping wires in a rush leads to improper removal of wire’s insulation and even damage on the wire itself. Hence slowness and careful techniques are the ideal practices.
- Forgetting to Maintain the Tool: Not cleaning blades or handles leads to uneven wire cutting, which may risk the integrity of the conductor. Before cutting any wire, examine the tool for a few minutes.
What is the alternative approach to stripping Romex wires without specialized tools?
Utilization of a knife or razor blade to strip Romex
To use a razor blade or utility knife in stripping Romex, ensure the tools are used in a manner that does not cut the inner conductors. With a round cut made on the edge, pulling it out and then cutting it off works well when stripping the Romex wire. First, make a small slit in the cable jacket lengthwise, somewhere about one to two inches. Then, gently pull up the outer jacket back to the inner wires, which are encircled and grouped. Having them separated, make a small round notch on every single wire where its insulation can be found around using a light touch knife and with each conductive wire. To finish, manually pull off the insulation from all of the wires. Always take precise measures to keep the conductors intact and safe. One must be cautious at every instant to remove the insulated sleeve from each wire.
Other techniques for stripping Romex when you are in a hurry
Tools are not always available, and so in such cases, some household items can be used for wire stripping Romex. One could make do without a wire stripper and take scissors instead. Insert the wire in between the tips of the scissor blades and then close the blades gently, just enough to cut through the outer layer of the wire without touching the inner wires. The first incision around the wire insulation would once again be a rotational kind, followed by removing the insulation. Alternatively, needle-nose pliers are useful for gripping and twisting wire insulation to loosen it for hand removal. There is no doubt that these techniques are less accurate than using a proper wire stripper, but if used carefully, using them in critical situations can be useful especially when the aim is to cut off the insulation as opposed to the wires inside.
Pros and cons of manual Romex stripping techniques
Pros:
- Accessibility: Utilizes common household tools available to most individuals.
- Adaptability: Offers alternative solutions when specialized tools are unavailable.
- Cost-effective: Eliminates the need to purchase specific equipment.
Cons:
- Precision: There is a higher risk of damaging conductor insulation than dedicated wire strippers.
- Safety: Increased potential for accidental cuts or injuries due to improper tool usage.
- Time-consuming: It may require more time and effort to achieve satisfactory results.
What is the best method for removing the sheath of Romex wire?
How to Enable Romex Sheath Removal Including Band and Cable
A utility knife may work effectively for Romex sheath stripping if employed prudently. However, using a dedicated wire sheath stripper should be a preferred option because the utility knife might tend to ruin the wire and cut off the internal conductors. In no more than two passes, the tip of the knife should be drawn along the cover without penetrating the sheath too deep. Simply bending the cable helps to split the sheath in the scored region. Pulling the sheath further helps disengage it from the inner wires. While using the knife, don’t rotate or twist it too much, as this might damage the wires. This method works because it prepares the conductors for electrical wiring.
How much Romex sheathing should be cut off for electrical wiring purposes?
The specific Romex sheathing stripping length that will work best seems to be invoiced based on the work to be accomplished. However, for regular connections of conduits and the switch cable openings, approximately 6 inches of inner conductors are exposed for ease of making the connections and fitting the conductors inside the electrical boxes. Any Romex cable being taken to a junction or in the Pananl wiring installation requires a length of approximately 8-12 inches to be left bare from within the conductor’s sheath. The reason is that such length provides room for any modification that might be required during the later re-arrangement of the wiring. Local electrical codes and standards, on the other hand, must always be checked because they sometimes prescribe different needs purely based on project-specific requirements or safety measures.
Working with thick or bound Romex jackets
To fix stubborn or tight fitting Romex jackets, heat the area around the sheath with a hairdryer or heat gun according to its low/ medium settings, this helps in peeling of the jacket. This will make the sheath pliable and seek protection from the internal wires. Moreover, if there is no sharp cutter or tool that can peel the sheath, it is advisable to sharpen one since sheafing a jacket is already difficult, as a sharp blade will cleanly cut the sheath with minimum pressure. If the sheath fails to easily degum, glasses or goggles can be used for protection, and splitting the bandelette into many small pieces can also be helpful instead of trying to remove it as one single piece. Use caution not to disrupt the insulation on the conductor while doing so.
How should one remove Romex from cables within an electrical box?
Preparing the Romex for installation within an electrical box
When preparing Romex for termination in an electric box, use a wire cutter to cut the cable to the required length. Ensure that the inner conductors are free from damage by carefully stripping the Outer sheath with a utility knife or retreating to about 6 inches. When performing reconnections, use only as much sheathing of 17 that is required, which is around 1/2 to 3/4 of an inch. Ensure the Romex does not bend, and insert cable clamps into the box to prevent further bending. Before reconnecting the wires, check the local electrical standards and codes to avoid breaching the requirements.
Stripping Romex Wires and Organizing Them In Tight Spaces
When dealing with Romex wires in congested locations, it is critical to follow the practices as they place usability and safety on the same page. Start by marking out the penetration of every cable to not interfere with the overall layout of the enclosure. With a cable stripper, cut the sheath while leaving enough length of conductors (this should be minimal, though) so that the wires do not cause unsightly congestion but only allow for essential connections. Based on where these wires are supposed to go, group the wires, organize them in an orderly fashion, and fasten them with cable ties or wire staples to prevent tangles or interference. Additionally, ensure all conductors are terminated, and all the excessive wires are coiled neatly to prevent unnecessary confusion and possible damage to wires during installation or general maintenance. Consult appropriate electrical codes regularly and ensure that all the NM cable installations in the wire arrangement comply with the regulations and the safety requirements expected in tight locations.
Proper Grounding Technique with Romex in Boxes
A bare or green insulated wire is a common feature that can be identified and connected to the grounding screw or clipping attached to the box, and this will effectively help in the grounding of working with Romex in boxes. In a case where more than one Romex cable is used, all ground wires, including that of the box, would be wired using a wire nut. Ground wire would be connected to the ground terminal of the device, and the device would then be connected. Ultimate tightness and binding of these links will comply to the national electrical code while also guaranteeing a suitable ground. Periodic restraint of these links is vital so that they do not become loose or corroded or sustain any damage so that better networking of Romex in boxes can be achieved.
How can I increase the efficiency and speed of the stripping of Romex?
Tips that may be convenient for an electrician’s time
When stripping Romex cables, pay attention to efficiency and speed by getting an excellent wire stripper specifically for Romex cables. You may want to get a wire stripper that is automatic or self-adjustable because it will help alleviate the operator’s need to make any manual adjustments. Other works, such as marking the common stripping length required on the tool, can help eliminate guesswork. Furthermore, set up your workstation for quick and easy access to your tools to streamline your workflow, especially when getting ready to strip the insulating jacket of NM cable. Cut and strip cables in a particular manner several times to create an automatic response in your muscles, and your hand will consistently execute the action. Last but not least, regularly perform maintenance such as sharpening blades or replacing them if blades are dull to improve your tools’ performance. Following these practices can greatly boost productivity and save time when working on each task.
Creating a standard technique for stripping Romex wire
In order to strip a Romex wire efficiently and accurately as desired, creates an understanding of the construction and type of gauges Romex cable consists of. First of all, look at the wire after equipped with an adequate amount of conductors to get an exact idea of what point the stripping should be done to. Position the wire stripper to the outer sheath, apply even force around the grinder, and rotate it or pull in a direction where the inner wires are least hurt; this should allow for a clean cut. Focus on hand movement adjustment over some time to enhance muscle memory, thus improving timing and efficiency. Leverage the convenience of these habits systematically to maximize output and lower the tendency of variation, subserving the goals of stripping techniques.
Improving stripping performance of Romex wire
Improving and installing a sufficient end-output Romex wire entails accuracy, speed, and a good understanding of the tools used. Foremost in every wire cutting or stripping activity is the use of a wire stripping or cutting device, and with that being said, a top-notch auto-adjustable wire stripper should be used to lessen manual adjusters, allowing for speedy and uniform services. Stripping wire is an art of pressure applied at the right areas, so the movements should be controlled and performed accurately with the appropriate force to a certain degree. Wiring installation requires a certain level of precision, focus, and regular maintenance of tools; however, streamlining the process of stripping the wires and maintaining the tools can increase efficiency while being able to maintain the required levels of precision.
Reference Sources
Frequently Asked Questions (FAQs)
Q: What is Romex® wire, and why is it important to strip it properly?
A: Romex® wire, also known as NM (non-metallic) cable, is an electrical cable widely used for wiring purposes in residential buildings. The stripping of Romex® wire is one of the most important tasks that must be done correctly to avoid complications in future electrical connections. A wrong way of stripping invariably damages the conductors or creates bad connections that are potentially dangerous from an electrical perspective.
Q: What tools for stripping Romex wire are advisable?
A: Although a pocket knife can be utilized, it is advisable to use Romex strippers to ensure accuracy and safety during stripping. Klein tools have been found to be very useful since they serve as efficient Romex strippers capable of peeling off the outer sheath and insulation from individual conductors. Make sure to keep your tools gaged for your relevant work and only employ them when they are appropriate for the wire gauge (AWG).
Q: How do I prepare the Romex cable to be stripped?
A: When preparing Romex to be stripped, the first step is to grab some wire-cutting tools and measure and cut the cables to a desired length. Ensure that the length is appropriate to allow some slack for working inside the electrical box. Then, remove all the cables, including staples, fasteners, and temporarily folded sachets.
Q: Could you explain how the Romex sheath should be stripped properly?
A: When removing the sheath, Ramax users must first make one or two beautifully shallow incisions along the A-B axis located precisely six to eight inches from the extremities of the cable. Care should not be neglected when cutting into the insulation of the internal conductors. Now, hold the cable securely in one hand and pull the sheath back with the other to get an exposure of the inner wires. A more subtle process is the use of Romex strippers with sheath-stripping features. This method has proven to be much safer and precise.
Q: I am having trouble removing the sheath of the conductor wires that are shaped like THHN wires. What do you suggest are the required actions?
A: Once the covering sheath has been cut out, a user shall cut out the insulated covering of each wire, which in this setting is a THHN wire situated on the multi-conductor cable. To begin with, the common wire gauge, be it 12 or 14 in AWG for residential Romex exigences, uses wire strippers made especially for their gauge. Insert the wire within the bay of the stripper that applies best, squeeze it, then pull it towards yourself. Approximately three-quarter-inch of the wire cover should be heated. One must ensure that the solid wire is not cut or damaged.
Q: Are there any specific techniques to follow while stripping Romex in a box?
A: After the wiring is complete, if it is necessary to remove the sheathing inside the box while space is limited, be sure not to compromise safety and use wire strippers or a utility knife depending on the thickness of the cable, but it is always ideal to cut the wire before the installation of the cable within the box as it would minimize the risk of injury as well as make the task for completing the wiring easier. In addition, make sure to be attentive while pulling the coverings, areas that do not need to be covered fully and areas that need to be covered completely but do not need to go outside the box as this would result in the wire being too long to be practical while maintaining its usability.
Q: How do I strip a Romex wire without damaging it with a knife?
A: To safely strip the Romex wires with a knife, consider cutting the covering away from you while also using gentle force. In addition, don’t forget to score the sheath around its perimeter lightly while cutting crosses or anything else that can result in excessive pressure on the connectors within the jacket or excessive force on the sheath itself. However, whenever practical and possible, using a stand of Romex would be ideal as it guarantees a larger level of safety while carrying out the Romex wire stripping task, making the process more efficient.
Q: When there’s a single box with multiple Romex cables, how should I strip the cables?
A: If you have several cables in a single box, prepare and label them before beginning to strip them to know which is which. When stripping, start with one cable and ensure the other cables’ ended strips are held so they cannot touch so that there won’t be any contact striping. Check whether the box has enough capacity to hold all the connections and ends of the cables stripped of insulation. Furthermore, when it comes to filling electrical boxes and stripping, always follow the regulations of your local electrical codes.
Q: What lengths of the Romex sheath should I cut off during stripping?
A: The required installation can decide the sheath fringing width, but at least a quarter of an inch should remain in the box between the seating and fringing of the cable, which means the sheath has to be pulled back. This however is usually the case for pulling back the outer jacket, usually not more than 6 to 8 inches, it’s best to research the romex installations further further because codes can very much differ from one installation to the other. Ensure to cut the edges after checking articles that outline the specific codes for NM cable installations, as many of them differ based on requirements.
Q: Are there some specific mistakes to avoid lagging while stripping a Romex wire?
A: Leaving an appropriate amount of sheath or unused wire to facilitate wire connections, using the wrong tools during the stripping process, using variations of wiring without leaving sufficient insulation, or using insulators with too much thickness are major blunders. It is equally important not to pull or tug on the ground wire while removing the sheath, as this may cause the wire to break or detach from the assembly. To make safe and functional electrical connections, work with caution and pay attention to the details of your tasks.