


Comprehending the complexities of car stereo wiring is important for people considering putting in a new sound system in the car. This comprehensive guide takes care of the basics of car stereo installation and the wiring process. In basic terms, we can say that wiring in a car stereo is connecting the power cord and the supply and integrating the speakers and other audio devices. Some cars come with an insufficient stereo and are ineffective at producing quality sound; this is where aftermarket stereos come in. In this article, you’ll learn the basics and the necessary wiring tools to make your car stereo amplifier, speakers, and different kinds of audio peripherals work in unison to provide the audio quality that the aftermarket stereo is capable of. Also, the rest of the audio equipment will be set up in a way that does not conflict with any other car components, and here’s how to do this.
How Do You Properly Connect a Car Stereo Wire Harness?

What is a car stereo wire harness, and how does it work?
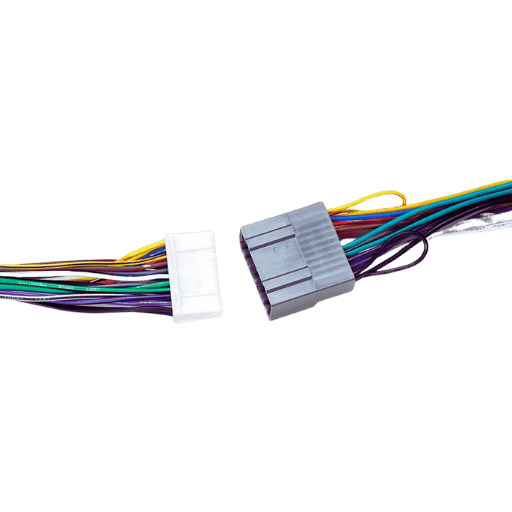
In simpler terms, a car stereo wire harness is a pivotal device in electrical wiring to make installing aftermarket stereos into vehicles much easier. It is responsible for interfacing between a car’s stock wiring and the new stereo, so cutting or splice wires is unnecessary. This interface usually comprises connectors coupled with the factory harnesses that reconfigure the car’s wire arrangement into a generic one, which is then readable by the stereo. It enables easier stereo connection to the car since the interconnects have already been wired, making it less error-prone and safeguarding the car’s electrical system from any damage.
Connect a New Car Stereo Wire Harness – Step-By-Step Instructions
- Make Sure You Have Required Tools and Equipment: Ensure you have wire strippers, crimping tools, electrical tape, and a wiring diagram specific to your vehicle.
- Disconnect The Car’s Battery: Before starting anything, make sure to disconnect the vehicle’s battery to avoid electrical shorts and untoward incidents.
- Remove The Old Car Stereo: Use the mandatory tools to carefully extract and remove the existing car stereo from the model.
- Locate The Wiring Connections: Study the wiring diagram and identify the colored wires designated for power, ground, and speakers within the vehicle’s harness accurately.
- Attach The Wire Harness Adapter In Place: Attach your wire harness adapter specific to your car to the new stereo by connecting wires employing crimp or soldering methods to ensure a secure connection.
- Make the connections and secure them. Wrap all connections made with electrical tape or heat shrink tubing. This will preserve the connections and prevent short circuits from developing.
- Make Sure The Connections Work Properly: Temporarily link the battery back and check the stereo. This will help determine if all wire connections are in order and if the stereo’s functionality works perfectly.
- Once the check is confirmed, put the car dashboard back in place, Detach The Battery Once More, And Place The New Stereo Into The Dashboard, making sure it is fixed properly.
- Attach the Battery Back: Connect the battery back and perform the last functional test of the stereo system to ensure that everything works perfectly and that the installation was successful.
Common Mistakes to Avoid When Wiring a Car Stereo
- Neglecting to Disconnect the Battery: It is essential to remove the car battery before working on anything electrical on the automobile so the chances of injury or a short circuit occurring are lower.
- Using Incorrect Wiring Diagrams: Always remember where you got the wiring from and how it was labeled or placed, as mistakes in the wiring will always lead to irreversible changes to how it functions.
- Improper Insulation of Connections: To prevent short circuits from triggering, all connections must be insulated, either with electrical tape or heat-shrink tubing.
- Mismatching Wire Gauges: Always remember to use the recommended wire plugs and sockets to avoid overloading or the risk of the components failing.
- Insecure Connections: To avoid reliability issues, always adopt reliable methods for crimping and soldering wires for a connection.
- Not Testing the System: To ensure the compatibility of all components before putting them together, one must test the stereo before everything else to save time in case it comes up faulty.
Why is it Crucial to Know Car Stereo Wire Color Codes?

Car Stereo Wiring Color Codes for Various Makes and Models
Different flags are hoisted on different days, similar is the case with car stereo wire color codes, for in this case, car stereo wire color codes in one country might be different from the same car’s stereo wire color codes installed in another country. This includes several crucial factors that must remain intact, such as the cross-connections between different vehicles manufactured by the same manufacturer. For instance, red is meant for power supplies, while black is used for grounding purposes and more for forward and rear speaker attachments. Caution must be exercised against these nuanced requirements; otherwise, installers tend to make mistakes that damage sections of the car stereo or make it inoperable. To maintain uniformity and effectiveness, the vehicle’s harness and stereo wires must be connected properly so the right wiring guide for the specific model is required. By the end of the day, as the icing on the cake, understanding what these symbols mean helps the installers set up the car stereo as desired.
A Proper Wiring Diagram for the Correct Installation
Each stereo set’s wiring diagram helps set up the car stereo in the most appropriate way. This technical graphic shows the wiring connections for different parts of the car and how they relate to the stereo system. In this way, even when it comes to the installation, car stereo systems usually include a directive that shows locations and dimensions for each wire color, what the color is, etc. This kind of planning means that the installation is completed fast and avoids minor electrical faults or damage to the components used in the stereo. Therefore, if a detailed wiring diagram appropriate to the car is available, installing the sound system may be done professionally and without complications.
How to Wire a New Stereo
To perform a stereo installation properly, get the wiring diagram for the model of your vehicle in conjunction with the stereo system so that the wire colors can be distinguished. Wire power, wire ground, and speaker are all codes with a color assigned to them. Red usually means power, Black usually means ground, and different colors apply to different speakers. Stereo wires are opposed to studio decks by these codes and vice versa. Correct connections must be made to ensure no damage and malfunction, which results in a successful installation with good stereo sound.
What Tools and Kits Do You Need for a Car Stereo Installation?

Car Stereo Wiring Tools
Investing in the right tools assumes paramount significance in achieving the desired outcome when performing such a migration of a car stereo installation. In this case, panel and component removal tools would be flathead and Phillips screwdrivers, wire strippers, and crimping tools to ensure secure crimp connections. A multimeter will allow testing of the voltage of connections made and confirming the wire connection. They also need a good supply of electrical tape and zip ties to secure all wires and avoid a mess. In some installations, socket wrenches and panel removal tools would be necessary to avoid damaging vehicle interior parts when they need to be removed or when their access is required. Buying a complete wiring kit is recommended to unlock the professional outcome with such installations.
How to Choose the Right Car Stereo Installation Kit
The car stereo installation kit must be appropriate to enable proper and professional installation. Such kits usually contain the wiring harness- dash kit- and antenna adapter specific to the vehicle’s details. Ensure once again that the kit is compatible with the dimensions of your newly purchased stereo unit and interfaces where steering wheel controls and factory amplifiers are located. Kits containing high-quality fabrication that can withstand climatic conditions and ensure reliable connectivity should be sought. Reading feedback from clients and engaging the services of auto sound experts also assists you in your efforts and helps embed the newly purchased stereo system comfortably.
Why a Dash Kit is Important for Your Car Audio Setup
A dash kit allows for properly installing a new stereo unit into a vehicle’s dashboard. As such, a dash kit is important for your car audio installation. They are molded to a car’s specific shape, dimensions, and other characteristics to avoid interfering with the dashboard’s aesthetics and operation. In addition, a dash kit makes the installation process easier by including all the brackets and fittings needed to properly mount the stereo, reducing possible damages to both the dash and the stereo components. Proper dash kits will also preserve the factory-started style and ensure the new installation adapts entirely to the interior work.
How do you connect an amplifier to the car stereo system?

Amplifiers in Car Audio Systems, What Are Their Functions
Car audio systems would not work efficiently without amplifiers, as these components provide sufficient power to speakers. An amplifier increases the voltage so that the audio signal can be sent with greater detail, thus reducing distortion and improving the sound overall. It becomes an indispensable component when connecting a subwoofer or using high-powered speakers since it gives the required strength, allowing for deeper and more volume bass without overloading the stereo unit. Installing an amplifier in your car’s audio system would allow you to improve the quality of sound significantly so that you can enjoy music the way it was meant to be heard.
Resolving Problems Associated with Amplifier Installation
While resolving the challenges associated with amplifier wiring in vehicles, some common perspectives are important to mention. First, ensure adequate and secure grounding since instability causes poor power and noise in the system. Check all connectors and joints for wear that could lead to signal losses through transmission. Besides that, check the power and remote turn-on line for the same voltage level. It is also advisable to do a fuse check, ensuring they are not blown out and are of the right rating for the system. As a last resort, consider the network of wires to check for any shorts and improper connections of inputs that might hinder the work of the amplifier. By taking a systematic approach to these issues, you will be able to recognize and correct many of the basic wiring faults that interfere with the normal operation of the amplifier.
What Are The Steps Involved In Testing Wiring Connections On Your Car Stereo Using A Multimeter?

Testing Connections On A Car Stereo Using a Multimeter
Having everything connected and working on your car stereo can be verified quite effectively by testing the car stereo wire connections using a multimeter. To begin, adjust the multimeter to the DC voltage setting. Make sure that all power wire connections coincide with the car battery’s voltage parameters, say roughly 12 volts. To check this, do the following: touch the multimeter probes to the wire ends while holding one wire and touching the other wire with your hand. After that, check to see what the reading is on the multimeter for that section. After this, adjust the multimeter to allow continuity measurement; this assists in checking the ground wires. In that case, touch one probe on the car and one on the ground wire; if there’s a connection, the multimeter will go off. Finally, do the same continuity test on every speaker wire; this validates that there is no break or shortness on any speaker wire circuits. This systematic approach also ensures that all circuits are closed and all interconnects between systems are audio pass leads.
Maintaining Your Car’s Audio System
A common place to start when looking after the proper operation of the car audio system is to check all wiring to see if it was fitted properly and is connected securely. Before this, it would be best to use integrated diagnostic devices or a multimeter to check the required voltage levels of the components. Conduct audio tests on speakers regularly to check for equal sound compare ratio and detect the distortion of the sound waves. Ensure that the software and firmware are current for equipment that uses a DSP or a smartphone application. Following routine maintenance and conducting detailed diagnostic checks may mitigate the risks of some of the problems that afflict the audio system and also help maintain good performance for the audio systems in general.
Starting Troubleshooting When the Stereo Doesn’t Turn On
Don’t forget to take a look at the vehicle’s battery. It might be the reason for your stereo’s failure to turn. Specifically, check the stereo’s power supply fuse, most commonly located in the fuse box underneath the dash or the hood. This, too, should be changed if blown. Inspect any possible loose or damaged wiring in the stereo, such as power, ground, and speaker connections. If you have an aftermarket stereo, ensure it is properly wired into the rest of the car’s electrics. When these steps fail to help you with the problem, refer to the manual about the stereo or a qualified professional.
Reference Sources
Frequently Asked Questions (FAQs)

Q: How do I install a new car stereo system in my car?
A: Before anything else, remove the old stereo and disconnect the wires running to it. Once this is done, the wiring code guide can be used to connect the wiring from the new stereo to that of the car. After this, you must place the new stereo into the dash opening and use mounting brackets to secure it. After that, turn on the dash to see if each setting turns on and works properly before turning off the stereo altogether.
Q: Where can I find the wiring color codes for the car stereo system?
A: The wiring installation color applies to the stereo system and other devices, enabling the standard installation procedure to stay the same. Red wires connect to the main constant 12V power, yellow wires switch between the other 12 V power, and black wires connect to the ground. Blue wires can be used in power antennas. Other colored wires work with speakers and connect the left and right front speakers. You should get the wiring diagram for the car you want a stereo system in or get an adapter that connects all the wires.
Q: How do single DIN and double DIN units differ?
A: Single DIN is the industry standard for vehicle stereos, which are 2 inches in height x 7 inches in width. Single DIN height is less than double DIN head units, which are 4 inches in height x 7 inches in width. Most double DIN units have a bigger screen and inbuilt features like GPS or CD Players. In case of upgrading the stereo, check if the new unit can fit in the current stereo opening.
Q: How do I hook a car amplifier to my new stereo?
A: A car amplifier requires power, ground, and a turn-on wire to integrate into your stereo. Connect RCA cables to the stereo preamp output. Then, run a power cable with plugs from the amplifier to the speakers. Check to see that every connection is covered and well-done. Head units sometimes have built-in amps, but these are mostly external amps with more strength and sound quality enhancement.
Q: What exactly are the functions of a wiring harness adapter?
A: Wiring harness connectors adapt the wiring from the car to the wiring connected to the new stereo. It’s useful because you won’t have to cut or interfere with the car’s wiring setup to have the new stereo exposed. It maintains, however, the structure of the electric parts of the vehicle in case it needs to be reverted to an original stock setup. When you order a harness intended for a particular car, you greatly reduce the chances of screwing the wiring during the installation process.
Q: How can I enhance my car stereo with Bluetooth connectivity?
A: The best part about adding Bluetooth connection to a car stereo is that there are multiple options you can choose from. For instance, you can trade in your existing car stereo for a new head unit with Bluetooth integrated. Another option would be to install a Bluetooth connection that harnesses an auxiliary input on the stereo or an FM modulator. Some adaptors include extra features such as music streaming or even hands-free phone calls to make switching between devices easier. Ensure the solution selected is suitable for the car’s model and make.
Q: Can you describe patented virtual audio and how it optimizes the results of my car speaker system?
A: Patented virtual audio is designed to assist you in your car by improving the sound quality. Even when a car only has two speakers, they can make it sound like they are in roughly perfect spots. This, in turn, helps expand the depth and width, giving the sensation and impression that audiophiles are accustomed to and would achieve with quality-sounding home setups. When selecting a new stereo, you should seek out such features if you want to make the best out of the audio system.