


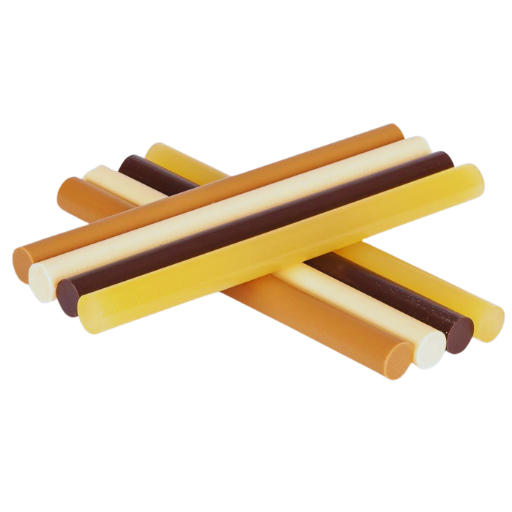
A wood filler stick is just as reliable as it is versatile when it comes to repairing minor imperfections on wood surfaces. It is very effective in helping restore the appearance of your wooden furniture, flooring, or cabinetry to make it look new by addressing small scratches, cracks, or even dents. But how does one use it so that it achieves seamless repairs? Worry not, for this guide will provide you the tips and techniques for maximizing the use of your wood filler sticks and ensuring that every repair blends impeccably into the remaining surface. Regardless if you are a keen DIY-er or a professional woodworker, this article is bound to equip everyone with the finer details to achieve the desired outcome every single time.
What is a Wood Filler Stick and How Does it Work?
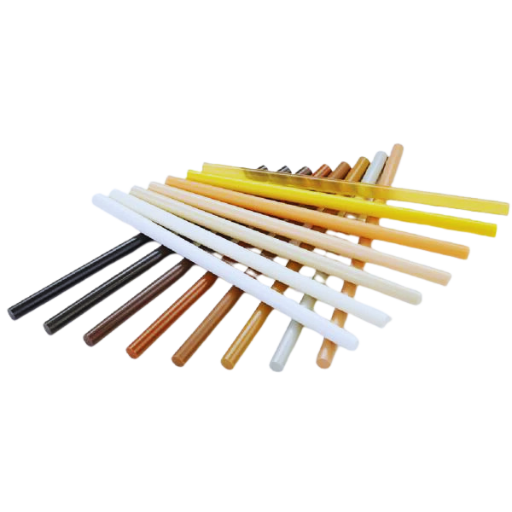
Wood filler stick serves as an excellent tool that can be used to fix scratches, cuts, and defects on wood surfaces. It is produced from a mixture of resins, and wood fibers along with pigments to help it match the wood in both color and texture. It can be applied by rubbing the stick on the required area gently. This fills in the gap properly and smoothens it out for easier sanding and finishing that can be done later. The wood filler stick serves to restore the looks and functionality of wood and, at the same time, seamlessly blends the repairs around the region. This allows the repair to last longer.
Understanding the Difference Between Wood Filler and Putty
Both wood putty and wood filler come in very handy during woodworking projects. The filler is usually water-based and used for structural repairs on non-painted wood, especially indoors. It can be fully dried, sanded, stained, or painted for a refined look. Wood putty is oil-based and pliable which suits it better for finished and outdoor works. Wood fillers can be putty and cannot be stained or sanded, which is offset as it come in set colors. This leads to wood filler being preferred for rough touch-ups while wood putty is ideal for smaller cosmetic repairs.
How to Choose the Right Filler Stick for Your Project
When choosing a filler stick, there are many considerations to keep in mind including the type of damage, the wood’s characteristics, and even the precise location of the repair. Choosing the right composition is also crucial based on whether you would require a wax-based or epoxy-based filler stick.
1. Assess the Damage
When starting, assess the abrasions present on the wood before deciding its particular type. For surface scratches, wax-based filler sticks tend to work better because they are easier to buff out. More structural damages tend to require more durable sticks, which is why an epoxy-based fill stick might be most suitable in that scenario.
2. Match the Color
To achieve satisfactory results, color matching is essential. To accommodate modern fusion sticks, which are available in multiple colors, consider using a shade darker than the wood to make it appear more seamless.
3. Consider Durability Needs
As for wax filler sticks, they work better with indoor projects because they tend to require less buffing to give off a smooth finish. However, if you plan on working with outdoor structures, then a weather resistant epoxy fill stick would be much more suitable due to its durability against harsh environmental conditions.
4. Interaction With Surface Treatment
When using a filler stick, check if it can be sanded down, stained, or coated, especially if the wood has not been sealed or finished. Sticks that are epoxy-based can often be stained, while wax-based sticks are generally incapable of being stained.
5. Know The Manufacturer Requirements
Research on product testing has shown that ’filler sticks’ are a broad category as they differ in curing time, flexibility, and how long they last. For instance, all epoxy-based fillers appear to fully harden within one 24-hour period and remain un-shrunk for numerous years. Always refer to product guidance to ensure it fits with what you are attempting to do.
After carefully considering these criteria, one can choose the right filler stick and achieve a professional, durable repair for any woodworking project.
Exploring the Benefits of Wax Filler Sticks
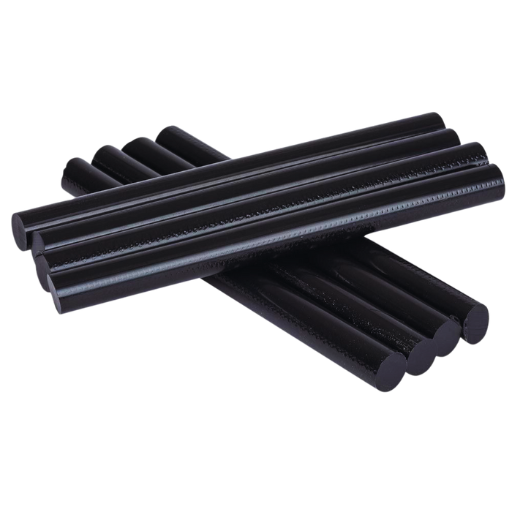
Efficient solutions for minor repairs in woodworking and furniture restoration can be done with wax filler sticks. Among their many advantages, ease of application stands out—as no special devices or tool preparations are needed for use. These sticks also allow rapid filling of scratches, holes, and cracks on wooden surfaces. In contrast to epoxy fillers, wax sticks do not harden, meaning they can be easily adjusted and reapplied as needed.
Wax filler sticks can be used for many wood types and finishes. Their soft composition allows them to blend perfectly with the existing surface ensuring visually appealing repairs. Donuts and screws come in different colors too, ranging from light maple to dark walnut masking.
Regarding their technical use, wax filler sticks are appropriate for zones that do not experience severe abrasion or stress such as decorative and lightly used wooden surfaces. They are not effective for load-bearing repairs but far exceed in cost efficiency alongside long shelf life for both professional woodworkers and DIY workers.
How to Repair Scratches and Gouges on Wood Surfaces?
Step-by-Step Guide to Using a Wood Filler Stick
Assess the Damage
Begin with a visual examination of the wooden structure and determine the damage level. For scratches, small gouges, and other minute marks, wood filler sticks will suffice. Strive to use a more robust solution for a more severe damage or structural problem.
Clean the Surface
Clean the damaged part of the structure thoroughly to ensure there is no dust, debris, or previously used wax. Use a soft cloth to wipe the spot with mild surface cleaner. Ensure that the area dries before applying any cleaning products. This helps in improving the adhesion of the filler wax.
Pick the Correct Color for the Filler Stick
Pick the wood filler stick that resembles the color of the wood as closely as possible. Professional-looking results will be achieved this way. Some manufacturers do offer shade mixes that help in perfecting the match for the wood grain.
Applying the filler stick steps
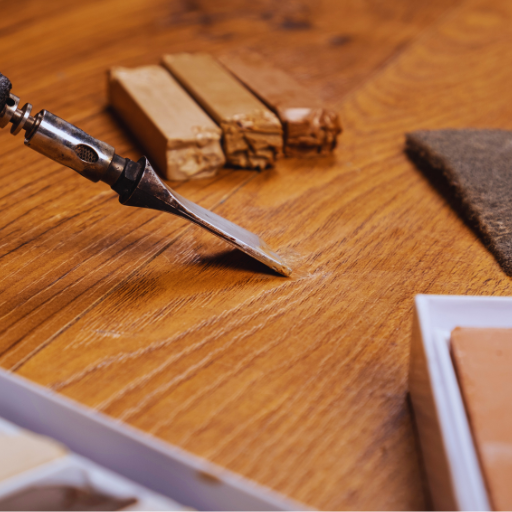
Apply the stick while maintaining a vertical angle from the damaged surface. Make sure to apply some pressure to the area where damage has occurred.
Move the stick back and forth to progressively fill the scratch or gouge.
Apply enough force so that all voids are filled.
Smoothing the Surface: Secondary Step
After the compound is applied, use a plastic scraper, card, or your fingertip to smooth out the filler material with the surface of the wood. Carefully remove any excess material that is beyond the surface of the wood without damaging the surface finish at this stage.
Buffing: The Final Step
Let the filler sit for a minute. Then buff the area with a clean, dry cloth while applying some gentle pressure on the area. This step ensures that the combined materials and area in need of repair are blended with the adjacent surface while leaving it smooth complimenting the wood surface.
Protective Coating: Optional
If the surface is exposed to a lot of wear and tear or, is done using regularly, then consider using a clear coat such as polyurethane sealant once the repair work has been done. This coating increases the durability and protects the repair area from being worn out easily.
Suggestion Section
Effect of Temperature and Humidity on Application Considerations
To achieve the desired results, it would be best to use the filler stick at room temperatures of 20-25 degrees Celsius as freezing and extremely hot temperatures change the filler’s consistency making it harder to adhere to any surface.
Wood filler sticks, if stored properly, can last for about two years which is a good amount of time. To keep these sticks flexible and easy to use, they must be kept in a dry and cool environment.
Cost and Coverage
Generally, the price range of a single wood filler stick is between $5 and $15 with a brand’s quality affecting the price. Each stick covers minor touch-ups for about 1-2 square feet in area, making it a practical option for small repairs, especially for a scratch repair kit.
In following these steps and recommendations, the restoration of wood surfaces is made easy while still retaining their aesthetic and functional value.
Tips for Using Wood Filler Effectively on Wood Furniture
Select the Correct Form of Wood Filler
Filler products are wood-specific and come in many categories, for example, water-based and solvent-based. Solvent-based water filters are easy to clean, eco-friendly, and effective in indoor renovations, while water-based fillers are more durable and resistant to water; therefore, they are more suitable for outdoor work. Each one is appropriate for your specific projects so choose wisely.
Prepare the Surface Properly
An effective and sound-absorbing surface will require cleaning, ensuring the absence of dirt including dust or other forms of debris and chipped material. You may want to use a cloth or vacuum cleaner to tidy up the damaged part of your workspace. If you are tackling large gaping cracks or obtrusive holes, sanding superficial areas first can help provide stronger adhesion for the filler.
Apply in Thin Levels
To achieve the best end result, you are better off putting the filler in thinner layers as opposed to trying to overfill in one go. The overall result is a reduction in cracking, a smooth end result after the process is completed, and is significantly better than attempting to cram all at once. Follow the manufacturer’s uploaded procedural steps to make sure each layer dries before applying the next.
Use Sand Paper for A Flawless Surface
After all fillers have set and hardened, start out with fine-grit sandpaper, which usually provides a more acceptable finish and growingly smooth as you use it. This will achieve a blending of the repaired area so that it is not distinguishable alongside the wood. Always follow the grain direction of the wood, as filling and overworking the wood surface with sandpaper could cause scratching marks.
Choose Color and Finish Wisely
To achieve an appealing aesthetic, the filler and the wood should have complementary colors. Consider fillers that can be stained or painted after drying, as they can be altered to match the final finish of your furniture. When preparing to stain, perform a test run on a small concealed area to ensure the outcome is as expected.
Consider Potential Shrinkage
After drying, some fillers are known to shrink, especially in larger areas. To combat this, it is best to slightly overfill the area of damage and allow it to settle before sanding it down to the desired height.
Final Steps Required for Maximum Strength
Following the directions provided by the manufacturer when it comes to drying time is vital when attempting to achieve stability and longevity of the furniture. Depending on the filler composition and application depth, full curing can take a day or more.
Taking into account these steps will allow for less complicated repairs on wood furniture while guaranteeing the structure’s durability and longevity.
Common Mistakes to Avoid When Applying Wood Filler
Bypassing Pre-sanding Steps
By skipping the cleaning and sanding of a damaged surface, the wood filler may not bond properly, which compromises the repairs. Even dust, grease, and loose debris not being cleaned can prevent proper bonding. A well-prepared surface leads to a strong bond and an easy application of the filler material.
Mixing Different Types of Wood Fillers
There are different types of wood fillers meant for specific uses. Water-based fillers should never be used outdoors and never on concrete. As the dry weather would render them useless. While solvent-based fillers do not work well indoors as they lack sufficient weathering resistance. For any project requiring moisture exposure, structural work, or finishing, pick a filler that meets all necessary criteria.
Too Much Filler Applied to the Surface
Using too much wood filler can increase the chances of cracking when the filler is fully cured. The only way to curb this issue is to apply the filler in thin layers slowly building up the layers until the desired thickness is achieved. With this method, one can achieve a smooth level and level finish without any risk of unwanted shrinkage.
Not Paying Attention to Drying and Curing Times
Drying filler and rushing the sanding or painting processes often lead to the reduction of strength and the weakening of the final aesthetics. Most fillers depend on a minimum of 24 hours for their curing time, although deeper applications or humid weather may require a longer duration. Always make sure to follow the provided guides to ensure that guarantee maximum effectiveness will be met.
Not Matching Colors Properly
The aesthetic merits of your wood furniture or surface can be negatively affected by poorly matched color fillers. It is advisable to try the color on a small area that is not exposed before using it to make sure that it will match the filler in question. Several various shades are available for many fillers and if none of the available options suit your needs, then tints can be employed to get the desired result.
Sanding techniques disregarded
Failing to meet the expected standards of sanding due to inadequacy or lack of uniformity in the pattern that is complemented by the application of filler may lead to unsightly, rough surfaces. Utilize fine-grit sandpaper to effortlessly soften, taking care not to blend it too much with the surrounding wood. If too much sanding occurs, excessive filler and destroy the surrounding wood will be the outcome.
Avoiding these mistakes is certain to enhance the appearance, quality, and ease of use of your wood filler application while ensuring long-lasting repairs to the professional level.
Can Wood Filler Sticks Be Used on Hardwood Floors?
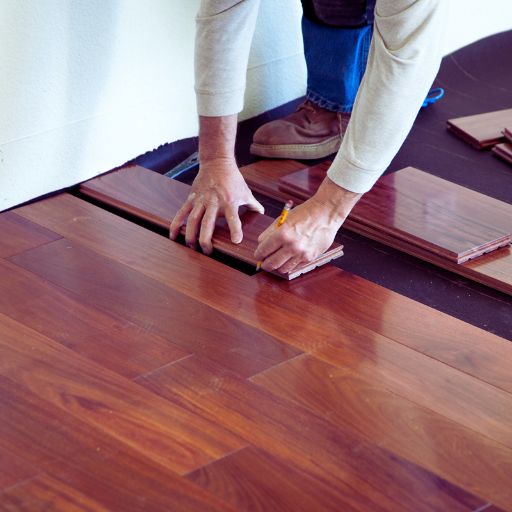
Assessing Wood Floor Damage Before Repair
Evaluating the level of damage is critical for underfloor repairs for wood types. You must always start with a visual exam to identify scratches, dents, gouge marks, and water damage. Surface scratches generally only need some refinishing, brown fillers, or modest construction, while deep gouge scratches will require reconstructive surgery refinishing. Water damage, discoloration, warping, and planks separating all indicate a wood’s prolonged exposure to water.
Industry data suggests as many as one in four to one of two hardwood floor damages are caused by water and usually require the area to be dry before refinishing the floors. Moisture meters can determine how much water the wood has, which has to be normal (typically between 6 to 9 percent for hardwoods) before commencing work.
Confirming the wood wool mixture is dry enough before achieving starts, ensure the parts that have suffered damage are approximate in strength and composure. Weaker flooring needs to be replaced rather than patched up. To determine the shape of the surfaces and gaps accurately which aids in creating an optimal geo, consider the edges which determine the gaps. An accurate window aids in proposing not only how best to repair the gurney and install the floor, but also how to obtain perfect enduring results.
Techniques for Applying Filler Sticks on Hardwood
To apply op filler sticks on hardwood, I ensure the surface is clean and free of dirt or debris that may hinder adhesion. Starting with the filler stick, I gently rub the stick over the scratch or gouge. Once deposited, I try to smoothen the surface by scraping with a plastic scraper while keeping the surface of the stick flat against the surface. The last step involves gently rubbing the region with a soft cloth which aids in blending the mixture with the surface wood.
How to Stain and Finish After Using Wood Filler?
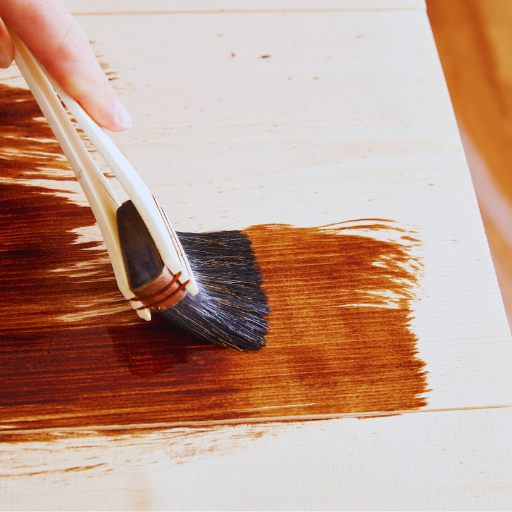
Preparing the Surface for Wood Fill and Stain
To get the surface ready for wood fill and stain, I sand it with fine-grit paper to make sure it is smooth and level. The next step involves cleaning the surface; at this point, I remove any dust that could interfere with adhesion. After applying the wood filler and letting it dry, I sand it again so it matches the surrounding wood. This is to make sure that the filler blends with the wood after it has been stained. Before applying the stain, I check the color on a small, non-visible area and change it if the color doesn’t match.
Choosing the Right Stain for Your Wood Repair
It is imperative to take into account various variables to achieve the most desirable, and natural-looking result when selecting a stain for wood repair. First, one has to determine the type of wood that is being repaired, and different species of wood will absorb stains in varying ways. Hardwood oak, for instance, and cherry will absorb the stain resulting in richer, darker colors, whereas softwoods, such as pine, will be less uniform and have a lighter tone.
The type of stain is also critically important. Different types of stains have various advantages and disadvantages that will serve to meet different needs. Oil stain is prized for its ease of use, and its economical and even coverage over the wood in contrast to the application of water-based stains. Nonetheless, water-based stains can dry faster, are less harmful to the surrounding environment, and emit less Volatile Organic Compounds (VOCs). Water-based stains in particular, for these reasons have become popular recently, as consumer awareness increases for such items. Industry data has surely noted that, in recent years, water-based finishes have increased due to tight environmental regulations and higher demand from consumers.
Stain swatches or pre-stain conditioners can be used to match the stain and existing finish for streamlined color uniformity. Pre-stain, for instance, is suggested to be used for soft, or porous woods as it reduces blotchiness and irregular absorption. Another way to match the desired color while sealing and protecting the wood is to use tint Polyurethane in combination with stains.
At last, evaluating the stain in an inconspicuous area is critical prior to set application. This will make sure the color parallels with your expectations as well as the adjoining wood, thereby lessening the chances of rework. If you handle these considerations appropriately, along with employing the correct techniques, restoring or enhancing the appearance of your woodwork will be done professionally with immaculate results.
Finishing Touches for a Professional Look
Professional wood finishing requires careful attention to detail during the last steps of the work. After the wood is stained, protective topcoats are applied once the surface is dry. Options for topcoats include laminate, lacquer, or shellac, which all possess different levels of durability and sheen. For instance, polyurethane is widely favored for its moisture resistance and ability to be scratched, which is useful for busy surfaces like floors or furniture.
Applying fine-grit sandpaper (320 through 400 grit) between layers of a topcoat enables a flawless finish. Regardless of if the coat is applied via brush, foam applicator, or spray, it is important to ensure a uniform, thin layer in order to evade bubbles or streaks.
Furthermore, dust-free workspaces can drastically improve results. These particles can cling to wet finishes, which serves to compromise the clarity of the surface. Thus, removing loose debris before application is important. The use of tack cloths, clean tools, and a controlled environment minimizes contamination.
Professional sheen can be achieved by polishing the final finish. The use of automotive-grade polishing compounds or fine abrasives enhances the smoothness of the surface, allowing for a mirror-like gloss, particularly for high-sheen finishes.
Utilizing these processes together with specific application techniques results in a final product that is not only visually appealing but also boasts a professional quality standard in woodworking.
What are the Best Wood Furniture Repair Kits Available?
Review of Popular Furniture Repair Kit Options
Having the proper kit when working on wood furniture helps achieve more professional results. Below are some of the most popular and dependable furniture repair kits on the market along with their description, usability, and effectiveness:
1. Mohawk Fill Stick and Marker Set
This kit is very popular since it is easy to use and has a broad application range, which makes it ideal for minor and moderate repairs. The fill sticks are useful in addressing scratches, cracks, and gouges while the markers help to blend colors. It comes with various shades to match different wood finishes and tests have proved that its color retention is good. Moreover, it does not require any specialty tools, which is great for DIYers of all skill sets.
2. Rust-Oleum Varathane Wood Repair Kit
The Rust-Oleum Varathane kit aims to meet the expectations of professionals working in restorational woodwork. This kit contains pre-mixed putty compounds that can easily fill deep cracks and larger imperfections in wooden furniture. Additionally, it has a selection of putty knives and different color shades to mask repairs into natural wood color. Comes with a detailed guide so users who lack experience can execute the task professionally. Based on the durability testing, the kit’s repairs have shown high-performance results even when subjected to extensive use.
3. Katzco Furniture Repair Kit
Katzco’s kit is ideal for super simple and fast touch-up emergencies. Repairs are accomplished with six retractable markers and six wax filler sticks to cover scratches, discolorations, and scuff marks. The different shades range from oak to ebony which allows it to suit most wood finishes. It’s effective for cosmetic repairs rather than repairs needed structurally. Independent user reviews show great rejoicing in the speed of the application as well as the nice-looking repair done.
4. Coconix Wood Restoration Kit
Built on an already sound reputation, the Coconix kit excels at both beginner and advanced projects, allowing woodworkers of any skill level to tackle any project. It comes with an entire set of customizable repair compounds that can be compounded to ensure any finish is color-matched. Tests of the kit show that it is remarkable at masking deep scratches and gouges while maintaining semblance with color and texture. The formula also happens to be water-based making it easy to clean, eco-friendly, and ideal for home use.
5. Rejuvenate Wood Furniture & Floor Repair Markers
This kit is great for small relatively touch up projects-scratches and minor scuffs on furniture and hardwood flooring are not a match for the touch-up markers included in the kit. Every set comes with six markers in common wood colors, and are more impactful on sealed or polished wood surfaces. Based on user feedback this kit applies effortlessly and dries smoothly which is ideal for uncomplicated encounters with furniture.
These as well as the previously mentioned kits are the premier rated solutions to currently exist for furniture repair. This also renders them capable of returning the appearance and integrity associated with wooden surfaces. Be it minor cosmetic flaws or rather deep structural issues, these thoughtfully crafted solutions cater to all including novice and professional craftsmen.
Comparing Wax Sticks versus Putty Sticks in Repair Kits
It is critical to examine the specific details, the scope of its application, and overall repair efficiency of wax sticks as opposed to putty sticks when it comes to furniture and floor repair. Each choice has some advantages, but the specific circumstances under which they are appropriate differ depending on the nature and extent of the damage.
Wax sticks
Composition and Usage: Wax sticks consist of colored wax which is meant to fill shallow scratches, tiny cracks, or small dents on wooden surfaces. They are suitable for spots that are smooth, sealed, and polished. Wax sticks lend themselves to manual application in that the user can rub the stick directly onto the affected area or can heat a small portion of the stick and use it as a precise filling tool.
Durability: Wax sticks are cosmetic repairs rather than structural fixes, and therefore, are not as effective for more permanent repairs. Their application is superficial and they will wear off in time, especially in places that are prone to high traffic or surfaces subjected to excessive levels of friction.
Appearance: Wax sticks will fill the wood with color since there are many shades of wax sticks available which range from oak, walnut, cherry, and many other common wood colors.
Ideal Scenarios: Wax sticks are great for areas that require less physical stress as for light scratches on furniture such as cabinets, tables, and even shelves.
Putty Sticks
Composition and Usage: Putty sticks are thicker and pliable as they are made from materials that may include resin or bonding substances. They are intended for deeper gouges and holes along with structural damage. The use case generally consists of applying putty to the damage and finishing the area with a scrapper or tool for a smooth surface.
Durability: Repairs using putty sticks are more long-lasting as compared to the repairs done using wax sticks. Since putty sticks can be used to fill deeper holes in areas, the stick becomes harder and provides a longer-lasting solution.
Appearance: Putty sticks come with a slightly firmer texture which means that more sanding or finishing would be required to make it look polished. Though it may not be as easy to finish it, the putty sticks do come in various shades to correspond with wood tones.
Ideal Scenarios: Putty sticks would work best for more serious damage like chipped wood on flooring and furniture or nail holes and deep scratches on putty sticks.
Strengths and Weaknesses
Wax sticks are quick and simple to use, which is appealing to many casual household users. Their ease of application is one notable advantage. However, their effectiveness is only temporary, as reapplication is often needed after some time, especially when working with plastics and paneling using fil-stik®. Putty sticks are also great for more precise repairs as they can durably seal large gaps or damage. However, they require a higher degree of skill and care when being applied.
Picking The Correct Option
Ultimately, it all comes down to the type and level of repair that is needed. Wax sticks are better for minor repairs and quick aesthetic touch-ups. Putty sticks are better for deeper long-term restorations, as they provide more robust repair solutions. It is often more efficient to keep both on hand so a greater range of repairs can be addressed.
Frequently Asked Questions (FAQs)
Q: What is a wood filler stick and how does it differ from wood putty?
A: A wood filler stick is a semi-soft wax filler used for quick repairs on wooden surfaces. Unlike wood putty which is typically a paste, wood filler sticks are solid at room temperature and soften when rubbed, making them ideal to fill gaps and address abrasions on wood. They’re ideal for filling small scratches, nicks, and imperfections in wood surfaces, while putty is better for more extensive repairs.
Q: Can wood filler sticks be used on all types of wooden surfaces?
A: Wood filler sticks are very versatile when it comes to being used on different wooden surfaces such as furniture and frames. They work well on finished wood and can even be used on some plastics. However, extremely deep scratches and large defects require the use of a hard-fill epoxy or wood putty instead.
Q: Do I need to sand the area after using a wood filler stick?
A: One of the advantages of using a wood filler stick is that sanding is usually not required. The waxy type of wood filler stick blended with the wood allows it to work without the need for sanding. If you decide to overfill an area, a gentle finish sanding with fine grit will suffice to smoothen out the area.
Q: Are Mohawk Finishing Products’ Fill Sticks good for woodworking projects?
A: Yes, Mohawk Finishing Products Fill Sticks are great for woodworking. These Fill Sticks are excellent for quick repairs and touch-ups on various woodworking projects because they come in an array of colors that are perfect for different wood tones.
Q: What is the difference between the wood filler sticks the touch-up markers and the wax sticks in the furniture scratch repair kit?
A: A furniture scratch repair kit came Filler sticks, touch-up markers, and wax sticks are all common features in it. Filler sticks are from wood filler sticks that work best to fill scratches and small holes. Filler sticks are from wood filler sticks that work best to fill scratches and touch-up markers work best on color matching and dealing with hiding all surface scratches. For very fine scratches, filling sticks is best because they tend to be softer than other sticks. Wax sticks are from wood filler sticks that work best to fill scratches and touch-up markers work best on color matching and dealing with hiding all surface scratches. Wax sticks are from wood filler sticks that work best to fill scratches and small holes. Fillers sticks are from wood wax sticks and are softer for very fine scratches. Markers are from touch
Q: Is it possible to use a wood filler stick to fill deep scratches or gouges and remodel it using a wood filler stick?
A: The best candidates for wood filler sticks would be the most shallow scratches and some wooden basic imperfections. It is suggested that you eliminate or cover deeper scratches or gouges with a stronger feature such as the all-purpose wood filler or epoxy which does the job of such fills pretty well. These epoxy or wood fillers do a much better job of filling larger voids and ultimately give you a lasting repair for larger damage.
Q: What is the best way to select the appropriate color wood filler stick for my repair?
A: In selecting the right color, the surrounding damaged area will determine the correct color of the filler stick by matching it with the darkest part of the wood grain filler that is available. Numerous brands, for instance, Guardsman wood repair filler sticks, have a variety of colors. If a perfect match cannot be found, it is advisable to use a little darker color, then blend it later with the surrounding area after applying the color.
Reference Sources
1. The Impacts of Wood Filler on the Mechanical and Thermal Properties of Polypropylene/Short Glass/Short Carbon Fiber Reinforced Hybrid Composites
- By: H. Divya et Al.
- Date of Publication: 6th June, 2022
- Publication: Journal of Brazilian Society of Mechanical Sciences and Engineering
Takeaway Points:
- This research looks into how a wood filler affects the mechanical and thermal behaviors of hybrid composites consisting of propylene with short glass and carbon fiber fillers.
- The incorporation of wood filler enhanced the wood filler composite’s mechanical properties, such as tensile strength, impact resistance, as well as thermal stability.
Research Approach:
- The authors prepared several composite samples with varying wood filler percentages and performed mechanical and thermal tests to analyze their performance.
2. Wood Residue-Derived Biochar as a Low-Cost Lubricating Filler in Poly(butylene succinate-co-adipate) Biocomposites
- By: Miriam Cappello et al.
- Published: January 1, 2023
- Journal: Materials
Major Takeaways:
- This study looks into the use of biochar from wood residues in the fabrication of biodegradable biocomposites.
- It was discovered that biochar enhances the processability and mechanical characteristics of the biocomposites and does not affect thermal stability.
Methods:
- The authors developed composites with different contents of biochar by melt extrusion and measured the composites’ thermal, rheological, and mechanical properties.
3. Caffeine modification of wood for its use as a novel filler in modern polymer composites
- Written by: Dorota Tomczak et al.
- Publication date: July 20, 2023
- Published in: Journal of Wood Chemistry and Technology
Important Points:
- The research looks into the possibility of using caffeine-modified wood as a filler in polymer composites and evaluates how it affects the composites’ antifungal and antibacterial properties while sustaining the composites’ mechanical properties.
Research Approach:
- The authors modified wood flour with caffeine and added it to polymer matrices, analyzing the mechanical strength and biological resistance of the resulting composites.