


Ever since woodworking came to be, it has been the transformation of raw materials into aesthetic and functional pieces of art. Traditionally, lumber is the primary medium. However, there is a shift towards resource optimization and sustainability within the craft. One such innovation, the creative use of glue and sawdust, widely considered a waste, has numerous benefits. This article examines the resourceful ways woodworkers are utilizing this combination to reduce material waste and repair damages. Understanding these applications, whether as an enthusiast DIYer or a seasoned craftsman, can transform projects while simultaneously embracing eco-conscious approaches to woodworking.
How Can I Use Sawdust to Fill a Knot in Wood?
When aiming to use sawdust to fill a knot in wood, follow the following procedures:
- Collect Fine Sawdust – For a uniform texture and color, ensure that the wood from which you collect the sawdust matches the wood you are working on.
- Mix With Wood Glue – Incorporate a small quantity of glue to the sawdust and mix it until thick paste consistency is achieved.
- Apply To The Knot – Using a putty knife or your finger, work the mixture into the knot as far as it will go fill so that everything is filled.
- Smooth The Surface – Using a putty knife, the filled area can be leveled and made smooth with the surrounding area.
- Allow to Dry – The glue’s guidelines should be adhered to in regards to how long the glue should be left to dry.
- Sand For A Seamless Finish – Eliminate any remaining dust and smooth the surface until it is flush with the adjacent wood.
This approach not only enhances the filled area’s strength, but also ensures a smooth transition with the rest of the wood surface.
What is the Best Glue for Knot Filling?
The appropriate selection of glue for knot filling contributes to achieving a professional and durable finish. Industry experts claim epoxy resins are the best option because of their unmatched strength, bond longevity, and adaptability. For instance, clear or tinted epoxy wood fillers, which are classified as high quality, do not compromise the aesthetic value of the timber while filling the knots.
Furthermore, epoxy glues do not shrink or crack, making these adhesives suitable for outdoor and indoor use. Because of how well they cope with temperature and humidity fluctuations, these adhesives excel outdoors. One very popular recommendation is a two-part epoxy system— where mixing ratios can be tailored specifically to the needs of the project. Moreover, these adhesives can readily be dyed or tinted to blend well with the natural grain of the wood.
As long as the timber’s surface area is relatively small, cyanoacrylate (CA) glues, also referred to as superglues, can be applied. It takes CA glue a little time to suture small or tight knots, so the process is convenient and fast. That said, superglue is unsuitable for durably and reliably affixing larger knots or performing structural tasks, where epoxy is ideal.
West System Epoxy and TotalBoat Epoxy are good options for woodworkers because they bond reliably and are easy to use. As is the case with other epoxy resins, their estimated compressive strength exceeds 8000 psi, which means they are amongst the strongest fillers available for filling knots and other cavities in wood.
Steps for Mixing Sawdust with Glue
Collect Finely Clean Sawdust
Sawing should cleanly break down the wood into sawdust, making sure to also clean the contaminants like oil, paint, and any debris. It is easier to work with finer particles making the paste smoother. In terms of repairs concerning wood, hardwood sawdust is recommended to ensure compatibility.
Select the Glue
Depending on the requirements of the task at hand, select the most appropriate glue. For basic cosmetic tweaks, wood glue (PVA) will do just fine, but if the workspace requires structural integrity, epoxy is more suited. When using epoxy, a two-part system will be required with a resin and hardener mixed at the rate provided by the manufacturer which is mostly 1:1 or 2:1 by volume.
Prepare the Mixing Area
Mixing can be done on clean surfaces that are also disposable, for instance, scraps of wood or plastic. When epoxy is involved, wrappers shaped differently than the conventional bowl are favorable as the epoxy can bond irrevocably.
Combining Glue with Sawdust
To begin with, place some glue and sawdust in a container. From there, add the ratio of sawdust until the desired consistency is achieved. For thinner gaps, a less dense paste is ideal, while a thicker consistency is preferable for filling deeper holes or cracks. Common mixture ratio is 1 part glue to 2 parts sawdust to achieve a paste like consitency; however, this may be altered based on the materials used.
Ensure it is mixed thoroughly
It is best to use a mixing stick or shovel to stir the mixture until the sawdust and glue are saturated with each other. While using epoxy, take into consideration the time spent mixing; this must be done before the glue is added to avoid curing issues.
Must be Applied Right after Mixing
After the mixture is completed, be sure to use a putty knife or similar instrument to apply the mixture towards the desired location. Almost all adhesives have set duration times: wood glue on average will begin setting in 10 to 15 mins while epoxy can stay active for 20-40 minutes depending on the formula and ambient temperature.
Clap and Allow to Cure
To achieve strength and accurate bonding, the mixture must be applied on the surface that is clamped. Depending on the type of glue, a different curing time will be needed. PVA glue, for example, requires close to 24 hours while epoxy needs up to 48 hours; though this is variable, depending on the environment.
Finish the Repair
After a thorough full cure process, sand the mixture to achieve a smooth surface finish. Best results are achieved using fine sandpaper as 220 grit. The area can further be stained or painted or sealed as required.
These sets of steps will ensure that the wood repair is solid and blends perfectly to the repaired wood seamlessly.
Tips to Match the Grain When Filling a Knot
To fill a knot in wood while achieving a seamless grain match, great consideration has to be given to the texture and color, along with the technique used. Always start with selecting a wood filler or epoxy that resembles the color of the timber species closest. Furthermore, for a better match, mix wood dust obtained from sanding the same wood into the filler. This replicates the color and adds the desired texture.
Consider the grain flow as this impacts the overall appearance of the wood. The filler should be shaped to complement the surrounding grain pattern, so a fine chiseling tool such as spatula or toothpick should be employed for the alignment which creates a resemblance to the flow. Once cured, gentle sanding will further level the surface so long as smooth alignment is maintained.
Research indicates that the use of several layers of filler improves results. This contributes to building a texture that has a profile from the grain. Moreover, layered fillers further mask the area to blend effortlessly avoiding sharp filled areas. To achieve better results, test the method on scrap material first.
What Types of Glue are Best for Woodworking Projects?
Comparing Wood Glue and Epoxy
Depending on variables such as the type of application and the specific requirements, wood glue and epoxy differ greatly in their use in woodworking projects.
Wood Glue
One of the most common types of wood glue is PVA (polyvinyl acetate). This is a glued used to bond wood surfaces. Not only is it easy to use, inexpensive, and provides a strong joint if properly clamped, but wood glue is best suited if a fast setup time is needed and the surfaces being bonded fit snugly together. It is also less difficult to clean up with water than epoxy.
Epoxy
In comparison to wood glue, epoxy is more versatile and durable, making it suitable for high-stress joints or other items exposed to moisture and heat. Epoxy works well for filling gaps or eerily uneven surfaces where wood glue just wouldn’t cut it. But, unlike wood glue, epoxy is generally more expensive, requires precise mixing, and has a longer curing time.
Choosing one over the other depends largely on the project’s demands. In the case of most general woodworking, utilising wood glue should suffice; however, for specialized applications requiring superior strength or resistance to environmental factors, epoxy is the better option.
When to Use Hot Glue in Woodworking
To fix something in place permanently, hot glue would not be the best choice as a woodworker’s adhesive of choice. It can be useful in the initial phases of assembly since the adhesion is fast, or during the particular stage of prototyping. Caution must be taken as the bond strength is not reliable in structural or long-standing applications, when cold glue or epoxy is better suited for the task. The application of hot glue should only be done for crafting purposes or law heavy-weight objects where no accuracy is intended. It is recommended to clean and dry the surfaces as much as possible before any application to maximize strength.
Advantages of PVA Glue in Fine Woodworking
Effective Bonding Strength
PVA glue is ideal for fine woodworking because of its exceptionally strong bond. PVA’s chemical composition enables it to penetrate wood fibers, and, in some instances, stronger than the wood itself.
Effortless Application
Since PVA glue has a smooth consistency, it is easy to apply. Unlike other methods, spreading it requires minimal effort. This step is critical when attempting reliable joins.
Safe and Non-Toxic
PVA is one of the few non toxic materials, making them suitable in professional workshops as well as home workshops. The advantage is notable in projects where safety is a top concern.
Flexible Open Time
PVA glue opens consistently, giving creators ample time to align pieces and adjust clamps with precision. This step increases the likelihood of well-aligned cut joints.
Compatible with Various Finishes
Fine woodworking projects are maintained with aesthetic integrity since PVA does not interfere with stains, paints, or any finish after application. In addition to these benefits, PVA glue aims to add clean lines to seamless finished work.
Cost-Effectiveness
The affordability and ready availability of PVA glue make it a great value option for both professionals and hobbyists. Additionally, it provides great value in terms of the end product achieved.
Water-Resistant Options
Formulations Type II and Type III of PVA glue, as an example, have water resistant properties which makes them suitable for woodworking applications like kitchen cabinets and outdoor furniture that periodically gets moisture exposure.
Low Creep Factor
PVA glue’s curing stage retains very low “creep” which allows the glued joints to remain motionless while enduring pressure over time. This is important in fine woodworking where the parts need to be held in position stably over time and precision needs great spatial stability.
The combination of all these properties provides PVA glue with long-standing reliability as an adhesive in fine woodworking, where professional performance and user-friendliness are both crucial.
Can Hot Glue be Used for Knot Filling?
Using a Glue Gun for Wood Repair
Indeed, a hot glue gun can be utilized for wooden repairs, especially for knot filling, but it lacks professionalism and durability. As per my knowledge, hot glue guns work well for small voids and quick fixes. However, for long-term results, or if the wood will be subjected to significant stress, an epoxy or a structural wood filler is preferable.
Is Hot Glue Durable for Wood Projects?
The adequacy of hot glue on wooden projects must first consider how well it performs, its properties, and its limitations. Hot glue sets quickly, which can be beneficial for lightweight surfaces or temporary bonds. However, unlike wood adhesives such as PVA glue, epoxy, or polyurethane adhesives, the strength of hot glue is considerably lower. Research on the tensile strength of adhesive bonds suggests that hot glue loses its bond effectively at 25-35 PSI, while PVA glue can go beyond 3,600 PSI at its best.
Moreover, hot glue is susceptible to varying degrees of temperature. It can soften and lose bond strength in high temperatures while becoming brittle in extreme cold. The thermal instability classifies hot glue as unsuitable for projects that require prolonged outdoor exposure or extreme mechanical stress. Crafting hot glue is useful for non-structural applications of wood; however, professionals recommend stronger, more permanent adhesives for non-crafting work.
How to Make Effective Wood Filler with Glue and Sawdust?
Proportions for Mixing Glue with Sawdust
Correct ratios are key for the durability and ease of application of wood fillers made from glue and sawdust. A standard mixture usually consists of 1 part wood glue with 1.5 to 2 parts fine sawdust. With this ratio, the mixture will not be too runny, and will fill voids and gaps effectively.
While mixing, it is best to add glue slowly while stirring the sawdust until a uniform paste-like consistency is obtained. Drying glue on the wood surface makes it impossible to sand smooth when the glue adheres to coarse sawdust, which can result in a gritty surface. To ensure effective adhesion, the blend must be mixed thoroughly, and when sanded, the dried glue must be seamless. Achieving optimal results can be done by selecting sawdust based on the type of wood that will be used for the project to ensure the gap filler will have a similar tint.
How to Apply Wood Filler to Woodworking Joints
Preparing the Joint
Prior to applying a wood filler, check that the joint is clean and dry. There should not be any dust or dirt sitting on the wood. Do a quick vacuum or brush off any debris. Loose debris can ruin the bond that is formed between the wood and the filler. If the joint is too wide or has too much loose material, it may help to wood glue it or use some clamps which will help in stabilizing the joint for the filler.
Determining the Right Wood Filler
Go for the wood filler that meets the requirements of your project. For outdoor projects, solvent-based wood fillers are better because they can endure harsher weather. On the other hand, water-based fillers are better for interior use. Verify the manufacturer’s instructions about the parts of the filler that are compatible with paints and stains, as well as the drying times. An analysis of popular wood fillers shows that water-based options are faster, usually taking around 15-30 minutes, while solvent-based fillers could take a few hours.
Workflow
Using a putty knife, meticulously integrate the wood filler into the joint. Start by pushing the filler into the void so that it slightly overflows; this will guarantee that every cavity is filled. Shrinkage will occur when the filler is drying, but in this case, the overfilling will counteract that. Use the knife to smooth the surface and remove some material to facilitate simpler sanding later on.
Drying and Sanding
As with every product, the filler requires drying time, so it is best to follow the instructions provided. As a rule, wood filler products within 30 minutes to 2 hours, but this period may vary depending on product specifics, humidity, and temperature conditions. Once the filler has dried, the next step is sanding, which requires a finer grit, more specifically 120 for the initial sanding, and 220 for the finishing touch. Remember to sand properly so that the joint can undergo finishing without displacement.
Applying the Final Touches
After ensuring that the wood filler is sanded smooth, remove the dust and apply the finish of your choice. If a stain is intended to be applied, performing a test on a small and concealed area is advisable. It is best if the wood filler is stained with an unaltered pigment of wood or is uncolored filler; this helps in achieving superior results for uniform surface filling. Additionally, varnish or a sealant can be applied to the joint for added strength and protection.
These strategies enhance the appearance and quality of almost any woodworking project, and wood fillers can help achieve strong, seamless joints when used correctly.
Finishing Techniques: Sand and Stain
In woodworking, an even stain and professional polish are accomplished through the pivotal mixture of sanding and staining. Sanding an area evenly smoothens a wooden surface and optimally enhances its cavity’s ability to take in stain. This also ensures uniform application, rich color, and uniformity of the wood’s hue. Begin the process by using coarse-grit sandpaper (P80-P100). This initial stage focuses on removing rough surfaces or imperfections. Following that, switch to finer grades like P180 or P220 to even the base and further reduce scratches. Ensuring that you sand with the grain is paramount—cross-grain marks, which may not be quite visible until after staining, could pose a problem.
Water-based stains are preferable for low-odor projects since they dry instantly. Similarly, oil-based stains are renowned for their high saturation, richer hues, and long application window. Stains give control over the outcome of the project, but require precise addition to be effective. They maintain vibrant colors while providing smooth application for indoor usage. Usually, oil-based stains will outlast water-based counterparts, and stains can be added to dull projects to enhance visual appeal. The blurring of colors should be cleaned off before application, and a systematic approach should be ensured. Stains can be applied with a sponge, brush, or cloth.
Data indicates that sanding to at least P180 grit provides optimal stain adhesion while maintaining even color penetration. Furthermore, pre-stain wood conditioners are suggested for softer woods like pine and spruce since they help minimize blotchy stains that occur from uneven absorption of the surface stain diffusion. After the stain is fully dry, topcoating with polyurethane or varnish enhances the finish by forming a protective barrier, improving durability, and achieving the desired sheen.
By effectively combining these techniques, woodworkers improve the quality and aesthetic of their pieces, be it furniture, flooring, or intricate decorative woodworking.
Why Use Adhesive Alternatives like Hide Glue and CA Glue?
Benefits of Hide Glue in Traditional Woodworking
Due to the special features and flexibility of hide glue, it has been used in woodworking for centuries, especially in traditional wooden crafts. One benefit that stands out is its reversibility, which permits joints to be taken apart using heat or moisture, making repairs and restoration of antique furniture possible without damaging the original material. This is a great help in preserving critical historical craftsmanship on heirloom pieces.
Hide glue provides an incredibly powerful bond and works even better by shrinking as it cures, pulling joints even tighter together. This characteristic provides a secure bond and minimizes the number of clamps needed during the curing. Research indicates that properly prepared hide glue is capable of enduring significant tensile and shear stress, preserving bonds for decades.
Another advantage includes its compatibility with finishes, as hide glue does not inhibit the absorption of stains and varnishes. Its adhesive nature helps avoid marks in the surrounding wood, resulting in clean surface woodwork. Joints bonded with this glue possess natural resistance to creep, meaning parts under constant load remain unmoved and stable despite changing environmental conditions.
To wrap up, as a product of organic materials, hide glue is non-toxic which makes it eco-friendly and aligns with sustainable craftsmanship. Its biodegradability diminishes the impact on the environment which makes it appealing towards woodworkers looking to reduce their ecological footprint while still maintaining the quality of their work. Such diverse characteristics guarantee that hide glue will continue to be a dependable solution for accurate and lasting woodworking for years to come.
Quick Fixes with CA Glue for Wood
Superglue, also popularly known as CA (Cyanoacrylate) glue, is an adhesive with remarkable binding efficacy due to its speed. It is widely used to carry out minor repairs around the home or by woodworkers who specialize in time-pressured woodworking tasks. CA glue quickly bonds any two surfaces in the presence of moisture (even in the atmosphere), usually within a few seconds, and creates strong and durable bonds. It has many uses, such as filling small voids and cracks that might occur in wood, stabilizing them, or even attaching trim along with delicate pieces.
Another advantage of CA glue is that it works with activators/accelerators which lower the curing time further and improve the dependability of the bond. On wood, CA glue achieves a tensile strength with some formulations greater than 4,000 psi. For maximum bond durability, it is recommended that the surfaces to be joined should be cleaned thoroughly, and in this case, grinding the surfaces is necessary for achieving a good bond.
In addition to this, CA glue can work with a variety of fillers, for example, gap fillers, sawdust, or sanding dust. These properties not only enhance the aesthetic appeal but also improve structural integrity. The ability to be applied with precision makes CA glue very useful in intricate and delicate wood works, such as instruments, where tiny pieces are fixed, and intricate models, where assemblies are put together.
Ultimately, CA glue can be attained in different viscosities (thin, medium, and thick), which makes it suitable for the specific requirements of a woodworking task. For example, when creating small decorative pieces or conducting quick repairs on furniture, CA glue is a dependable, effective, and versatile option for wood repair and assembly.
Frequently Asked Questions (FAQs)
Q: What are the approaches for utilizing sawdust and glue to fill gaps in creative woodworking?
A: Sometimes a wood gap filler can be created out of sawdust and glue. For example, if you combine fine sawdust with white glue or carpenters glue, it becomes putty-like and can help in filling gaps or knots in wood. After drying, it can be sanded and varnished to level out with the surrounding wood.
Q: What type of glue would best serve to bind sawdust to wood?
A: White carpenter’s glue holds sawdust to wood well because it is specially designed for bonding wood parts. Titebond is a favorite of woodworkers.
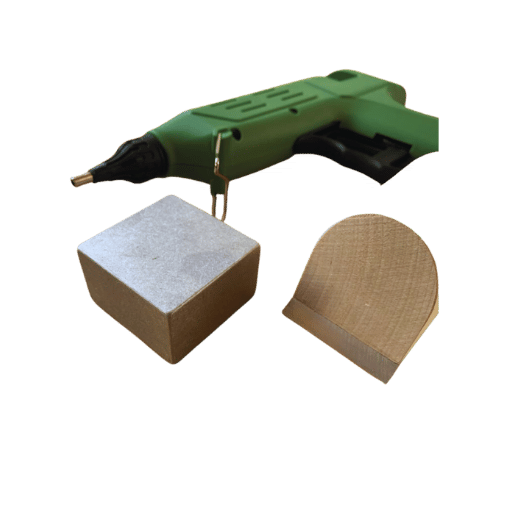
Q: Can glue and sawdust be used to achieve a shaped finish on wood blocks?
A: Yes, applying glue first on a surface then putting a layer of sawdust, will give a shaped finish after the glue has set. The cured glue may be sanded lightly for a burnished look or left rough for a rustic finish.
Q: What is the role of sanding dust in woodworking projects?
A: Just like sawdust, sanding dust can also be mixed with glue and used as a blend to fill minor gaps. This technique is particularly useful for making repairs that are undetectable from the rest of the wood.
Q: How does one ensure a strong glue joint when using sawdust and glue?
A: A good bonding glue joint will require Titebond or any wood glue of that sort. As far as the application goes, a uniform spread of the glue must be maintained, the pieces must be pressed adequately, and the parts have to be put on hold for some time in the workshop for other processes before they can be glued together.
Q: When working with sawdust, can epoxy be used in place of glue?
A: Indeed, epoxy can replace standard glue for any application involving sawdust. Unlike glue, which binds, epoxy fills spaces more effectively and serves best when a bond strength is required or when a clean finish is needed. It is also likely harder to sand compared to wood glue.
Q: Is wood putty and sawdust possible to use with a hot melt glue gun?
A: For the most part, sawdust is not combined with a hot melt glue gun as well. This is because hot glue does not bind with sawdust and is better suited where parts need to be stuck together. In that case, hot melt glue is ideal for the speedy attachment of components that do not require sawdust.
Q: What are the steps to combine glue and sawdust to form wood putty?
A: Create wood putty by blending glue with fine sawdust in a ratio that gives you a thick paste mix. Sawdust should be in excess if one needs to ensure. It is advisable to sand the surface clean after the compound has completely cured to put a finishing coat.
Q: Is it feasible to employ super glue in conjunction with sawdust in woodworking?
A: Super glue, also referred to as cyanoacrylate, can easily be mixed with sawdust for trivial repairs and area hardening. It bonds quickly and creates a strong layer, however, it is not as flexible when compared to white glue or carpenter’s glue which works better on larger projects.
Reference Sources
1. Upcycling Of Wood Dust From Recycling Particleboard As Filler In Lignocellulosic Layered Composites
- Authors: Wronka A., Kowaluk G.
- Published: 26-11-2023
- Summary: The investigation revolves around the structure of three-layer plywood that utilizes wood dust from particleboard as a filler. It analyzes multiple fillers like rye flour and wood dust produced by varying types of milling. Results indicate that modulus of elasticity increased with filler content obtained from first milling, while modulus of rupture worsened with increased milling. The study verifies the possibility of replacing fillers in plywood technology with wood dust while wondering the extent of removing glue residues to improve absorptive qualities (Wronka & Kowaluk, 2023).
2. An Assessment of Coal Dust and Wood Powder Ash as Partial Substitutes for Conventional Asphalt Concrete Filler
- Authors: R Akter et al.
- Published: 12th April 2022
- Summary: The objective of this study is to assess the suitability of coal dust as well as wood powder ash for mineral fillers in asphalt concrete. The research included the preparation of cylindrical Marshall specimens with different filler proportions and evaluation of their performance with the stability of flow and other volumetric measurements. It was determined that both fillers achieved acceptable limits concerning Marshall properties. However, coal ash demonstrated greater resistance in comparison to wood powder (Akter et al, 2022).
3. Set Fire to the Provided Layer of Wooden Dust by Chosen Sources
- Authors: I. Tureková, I. Marková
- Published: August 20, 2020
- Summary: This research investigates the focusing and the effects of parallel wood dust containing casing on the rest of the wood dust as well as all other casing that could be usd for ignition. The scope of the study included the particular characteristics of wood dust concerning the shape and dimensions of the area of contact of heating element with wood dust. The study also showed that the ignition temperature of various wood pieces differed, such that oak wood dust had the lowest ignition temperature. Tureková & Marková (2020).
4. Adhesive
5. Woodworking
6. Wood glue